The AI does not hate you, nor does it love you, but you are made out of atoms which it can use for something else.
—Eliezer YudkowskyA Paperclip Maximizer is an artificial intelligence whose sole purpose is to make as many paperclips as possible, which to the chagrin of its creator, ends up destroying the world in the process. It's a way of explaining why the folks at MIRI think it's important to study ways of making AI that will benefit rather than harm us.
I have several friends who study AI, so I decided to creatively misunderstand the notion of a Paperclip Maximizer, and thus conclude that AI researchers are inexplicably preoccupied with paper clips. So to ensure they never wanted for fasteners, I ordered a whole panoply of paperclips from around the internet and had them shipped to their desks over the course of a few weeks.
This amused me greatly, but after a few weeks it was time to take it to the next level. Thus was born Paperclip Maximizer 1.0:
Here it is in action, with early prototype clips on display that didn't quite have that je ne sais quoi:
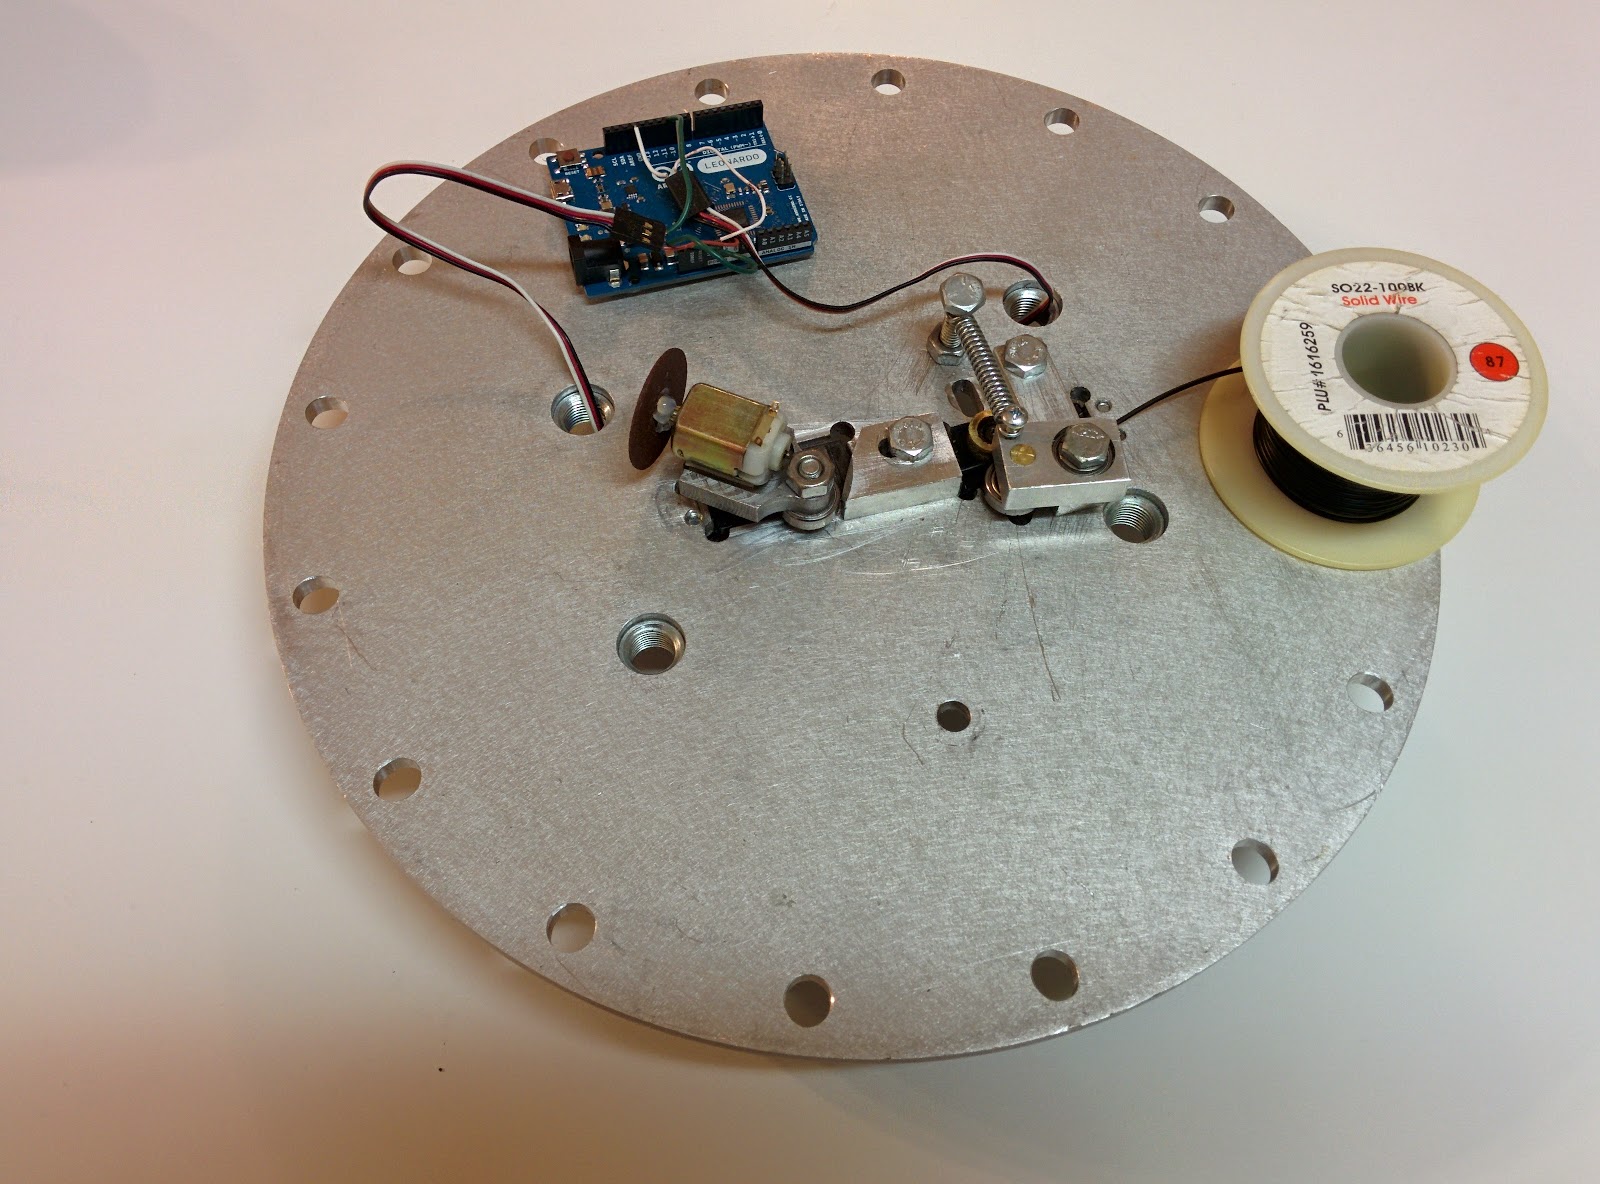
The mechanism is relatively simple, but taught me a lot about the subtleties of wire bending. Two GWS S125 1T sail winch servos provide all the locomotion, controlled by an Arduino Leonardo and about 2 pages of code.
These particular servos have a lot more range of motion than normal servos, and are also easy to modify for continuous rotation. That was important for the wire feed servo, which always needs to turn the same direction. When you disassemble this particular servo, you can just remove the gear that connects the axle to the potentiometer. Then when you drive it, if you tell it to move clockwise of where you left the pot, it'll turn clockwise forever, and vice versa.
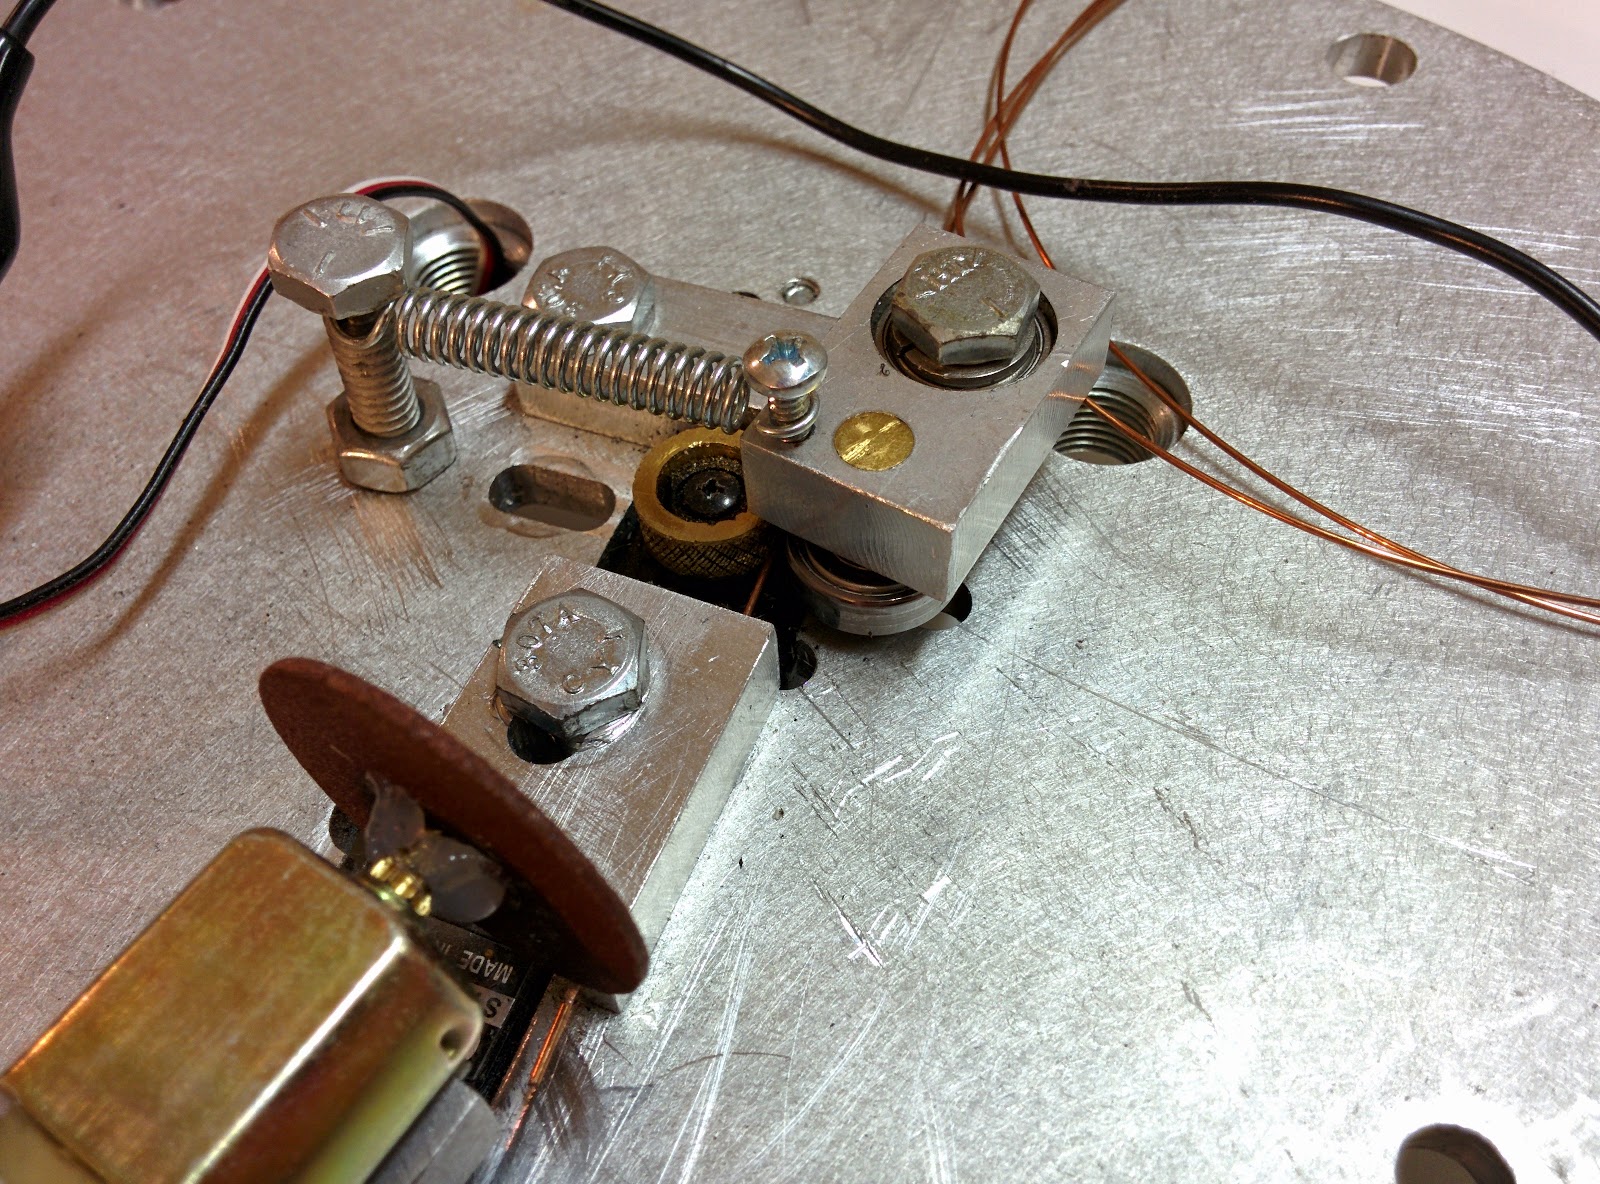
The feed wheel is a piece of brass rod I knurled on the lathe to give it some bite. It's pressed onto the servo, which means I needed to cut down a servo horn to a perfect cylinder. To do that, I wrote a program for the Arduino to make it rotate continuously, then clamped the servo upright in the mill. Then while the servo was spinning, I moved in with a spinning end mill.
Next to the feed wheel, you can see a bearing of about the same diameter. Its job is to hold the wire against the feed wheel. Originally I bolted the bearing in place, but the wire wouldn't feed consistently. Turns out there's enough eccentricity in the feed wheel that I needed to let the bearing move in and out slightly. So that's why you can see a big coil spring overhead, tensioning the bearing against the feed wheel and compressing the wire. If you watch the video carefully, you can see the arm move in and out slightly on the long feeds, broadcasting to the world exactly how bad my lathe skills are.
Next comes the feed block. Its job is to keep the wire straight and hold it in place while the bending unit bends the wire. Like the rest of the project, this turns out to be much more constrained than I expected: if there's too much space between the block and the feed wheel, then when the bender pushes back on the wire, it can bow and kink. And if there's too much space between the block and the bender, you can't get a tight bend in the wire.
I'd have liked to make the feed block longer to give me more room for the other components. But it needs a small diameter hole to pass the wire, and small drill bits also tend to be short. I think I even had to drill the block from both ends to reach all the way through with the bit I had available.
The bending head itself ended up also being pretty cramped. It needed to extend high enough to leave room for the bearing that does the bending. It's hard to see, but imagine the head starting out twice as thick as you see here:
I milled out all but a collar from the bottom half of the piece, and that's where it's attached to the servo. You can just barely see that collar between the head and the servo, to the right of the bearing. Then it had to reach over to the center of the bearing, but not crash into the feed block. So I had the mill cut that nice curved shape that you see leading to the bearing nut. But it wasn't a particularly critical dimension, so grinding the shape by hand would have worked just as well. Then the head on the 1/4"-20 bolt that holds the bearing turned out to be a bit too thick, so I had to grind that to about half its normal thickness.
If you watch real wire bending machines, you'll see that they create different curves by feeding the wire while they adjust the benders.
Turns out it takes a lot of force to feed wire into a tight bend, and my feeder wasn't up to it. So that's why I have to alternate feeding and bending, which I actually find quite delightful, since it adds to the quirky personality of the machine. If I had known at the start that I wouldn't be able to feed while bending, I could have designed the machine to use a fixed bending finger instead of a bearing. That would have made it a lot easier to make the tight bends needed for a paper clip -- since the bearing is round, it likes to deflect the wire back through the block as it approaches.
Since everything had to be jammed in close together, I was glad I chose to tap the mounting holes for the servos. If I had to do the project over again, I'd save a lot of time by using acrylic on a laser. But then I suppose I'd have to rearrange things, tap the acrylic, or maybe use some sort of press-in insert.
What about the big DC motor sitting on top of the bender? That's the cutoff wheel:
The way it was supposed to work was to not reset the bender on the last bend, but instead keep moving past the wire. Then I'd feed out the last leg of the paperclip, and then keep rotating the bending head clockwise until it brought around the cutoff wheel in to finish the job.
That's why you can see a dished out spot on top of the feed block -- I had to spend about 15 minutes manually and very gradually feeding the spinning wheel into the block so that it'd clear when moving into place, yet still end up close enough to the block to cut the wire instead of just deflecting it out of the way.
It's too bad that feature didn't work out, since the sparks you get with steel MIG welder wire make a great grand finale to the process! But the motor is easy to stall against the wire, which generally also browns out the Arduino. And about half the time, right at the end, the tiny sliver of remaining wire bends instead of cutting, leaving the finished paperclip attached to the next one. Oh, and the cut also ends up being razor sharp: I lightly grazed my fingertip with one of the cutoff pieces of wire and ended up with a very clean, deep cut. So that was the final nail in the coffin for the cutoff wheel.
Writing the Arduino code was one of the easiest parts of the project. I invited my AI researcher friend over on a Saturday afternoon and we coded and tuned it over the course of an hour or two, making lots of misshapen proto-clips that you can see littered around in the video. Everything is open loop: move the servo, wait, then move again. For the wire feed, there are one or two values where the servo will stop because that's where I left the potentiometer when I modified the servo. But the much better solution is to tell the servo library to detach, which stops the PWM signal to the servo, stopping it no matter where it thinks it is.


